Lace-up your shoes and tie your wrist wraps, folks – it’s time to pump some iron! Since this year has been so tumultuous, several gyms were forced to temporarily close their doors but still, members have been hesitant to visit the ones that remained open. Even if your gym is part of the lucky few still operating, it’s hard to feel 100% comfortable working out so close to other human beings!
Rather than continuing membership payments for a gym that you may not even visit for a while and feeling uncomfortable when you do go, have you considered building your own backyard gym? It’s not as complicated as you may think, and with a few frugal hacks, it can help save more money than that unused gym membership! So break out your sweatbands and stretch out your muscles – here’s how to set up an exercise space in your backyard.
Step 1: Wide Open or Keep It Covered?
Before you even lift a shovel, you have to decide if you want your backyard gym to be covered or uncovered. Consider the climate you live in; are you in an area with mild temperatures and steady weather patterns? Or does your corner of the world experience extreme weather patterns with lots of rain and snow, but blazing hot sun too? The answers to these questions are a huge determining factor for your backyard exercise space. If you have a gazebo, a sturdy deck, or – even better – a covered patio, consider building your backyard gym under those shelter sources.
Step 2: Establish the Space
You can’t just throw a bunch of workout equipment into your backyard and call it a gym. You still need space for cookouts, furniture, and play areas for the kids! Mark off the perimeter of the space you’ll need (or want) to use for your gym, and stick to that space. If you’re planning to use a covered area, consider the other things that may need to share in that area, like your grill or patio furniture. But once you’ve established your gym space, try to keep yourself within that perimeter as much as possible.
Step 3: Figure Out the Floor
A backyard gym is exposed to plenty of elements, not the least of which is the very ground it sits on! You don’t want to put your precious (and pricey) workout equipment on grass or bare ground, so you’ll need to figure out what kind of flooring you want to use.
There are tons of gym flooring options available! You can buy interlocking foam tiles for a low price, cork tiles, or rubber tiles. To help you choose which material to go with, consider the equipment you’ll be using in your gym. Are you going to throw around weights and dumbbells a lot? Rubber tiles are your best bet. Are you doing mostly bodyweight exercises and yoga? Foam tiles are gentle on your whole body. Choose a flooring material that works well with your equipment – or lack thereof!
Step 3: Let There Be Light
We know; sometimes, your schedule is crazy, so you need to get your workout in long after the sun has gone down – or before it’s coming up! To save yourself from exercising in the dark (because how dangerous does that sound?), install some light fixtures around your backyard gym space. Maybe you just need a floodlight on the back of your house, or maybe you need some string lights to give your gym a warm glow. Either way, do yourself a huge favor and light up your workout space!
Step 4: Landscape Space
Yep, we said it – landscape your backyard. Why bother making a beautiful new gym if you neglect the rest of the yard or have an unkempt workout space? You’ll need to tidy up the yard after all of the construction you’ve done.
You may have a lot of debris and junk to get rid of, especially if you excavated a new space for your gym! Rather than stress about where to take it and how to get it there, turn to a professional dumpster rental company like Bargain Dumpster. We’ll put in the work to clear out your gym space so you can put in the work for your health!
Step 5: Add Your Equipment!
Finally! After all that effort, your backyard gym is ready for the equipment. If you need to shop around for your first gym items, start with low-cost, low-maintenance essentials: a set of dumbbells or kettlebells, resistance bands, and a stability ball. Add a yoga mat if you want some extra comfort doing pushups, sit-ups, or, well, yoga! You can also get a good-quality jump rope and step machine to get your cardio in!
If you want to go all-out for your backyard gym, go for it! Get that treadmill, that set of weights, and Olympic lifting bar! Grab that squat rack from Amazon! Run to your sporting goods store for a rowing machine and stationary bike! Just be sure that you have covers for all of your equipment so that you can keep using it for years to come.
Step 6: Keep Things Organized
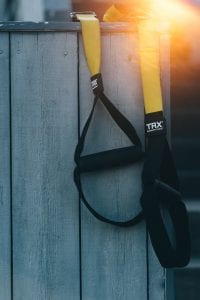
Last but certainly not least, KEEP YOUR EQUIPMENT ORGANIZED! So many home gyms – whether indoor or outdoor – wind up looking like a pile of old workout gear scattered all over the place. Once you know what equipment you’ll have in your backyard gym, make a plan to keep it organized. Do you need weight racks for your dumbbells or free weights? Do you need a place to hang your resistance bands and jump ropes? What about stacking your plyometric boxes together instead of leaving them all out?
No matter the equipment you have, make a home for it and keep it in its home when you’re not using it. It will help your equipment last longer since it’s well maintained, and it will make your backyard gym look even better!


