If you find yourself with a lot of idle time during winter, why not spend it in a productive and
fulfilling way? Move beyond small crafts to more substantial woodworking projects. Home
improvement upgrades will give you something to focus on while helping you build your skills
and add significant value and personality to your space. Clear some space in your workshop or
garage and dive into one of these three stylish and practical DIY-friendly projects.
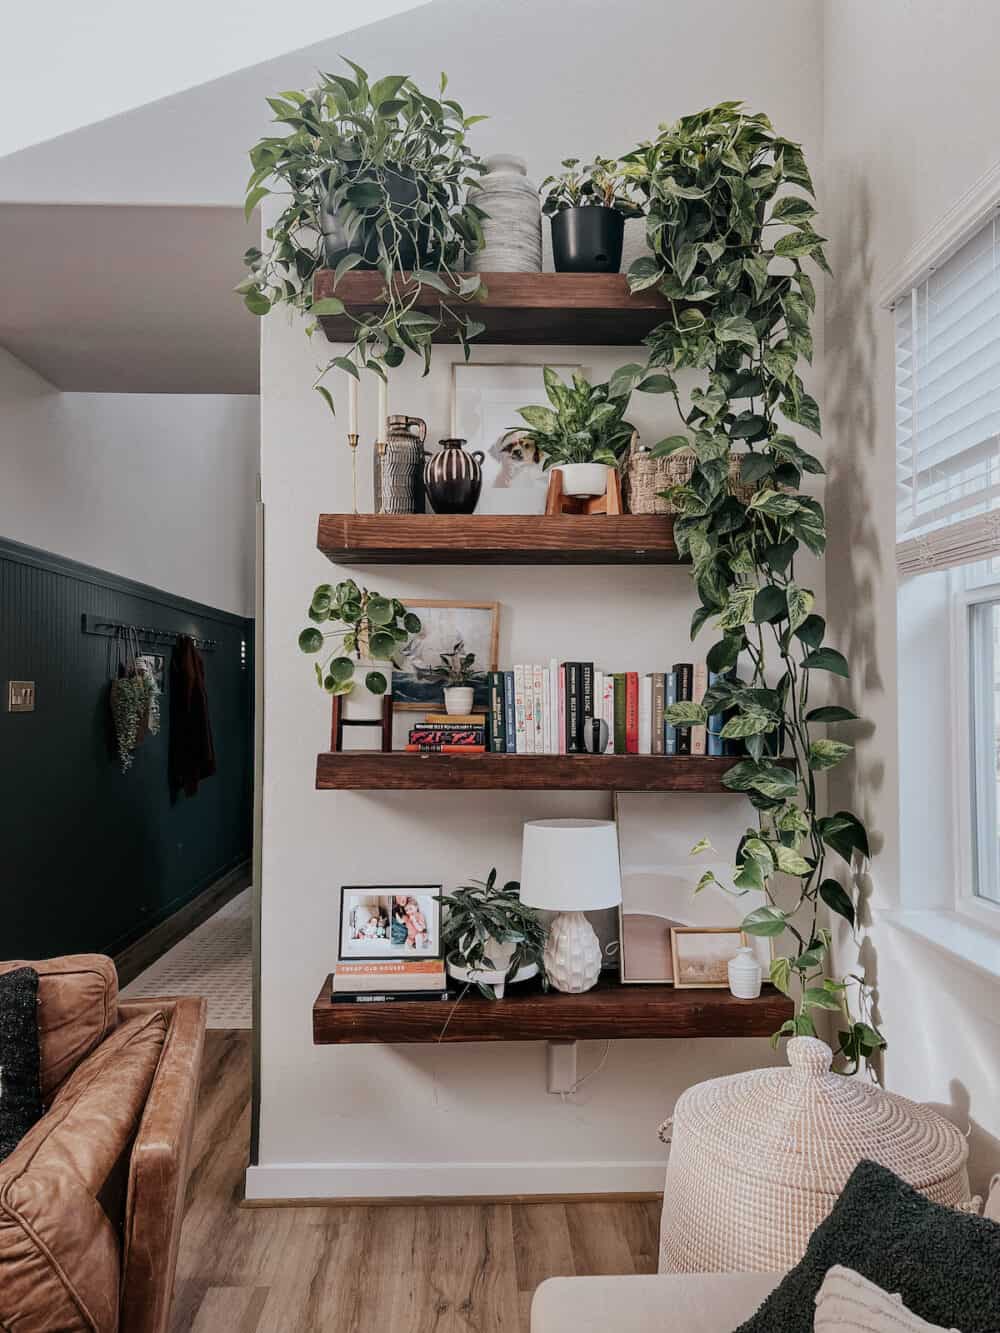
1. Build a Set of Floating Bookshelves
This project will wow your guests without being overly complex. Custom floating bookshelves
are a favorite among DIYers because they transform any wall into a functional display. With just
one weekend and some common materials, you can create a feature that looks like it was
installed by a professional.
A Modern Look for Minimal Effort
Floating bookshelves are effortlessly high-end, offering a clean, minimalist look that feels
modern and custom-made. Unlike traditional bracketed shelves, the hidden hardware makes
them appear to float on the wall, creating visual interest in any room.
You have full control over this project’s design. Feel free to build a single, long 6-foot shelf
under a mounted television for gaming consoles or create a staggered arrangement of three 2-
foot shelves to display decor in the hallway.
Floating bookshelves are ideal for smaller rooms or apartments because they occupy zero floor
space. They provide valuable storage and display area without adding floor clutter. You can do
all the cutting, assembly and finishing indoors, making floating bookshelves an ideal project for
cold or snowy days.
What You’ll Need
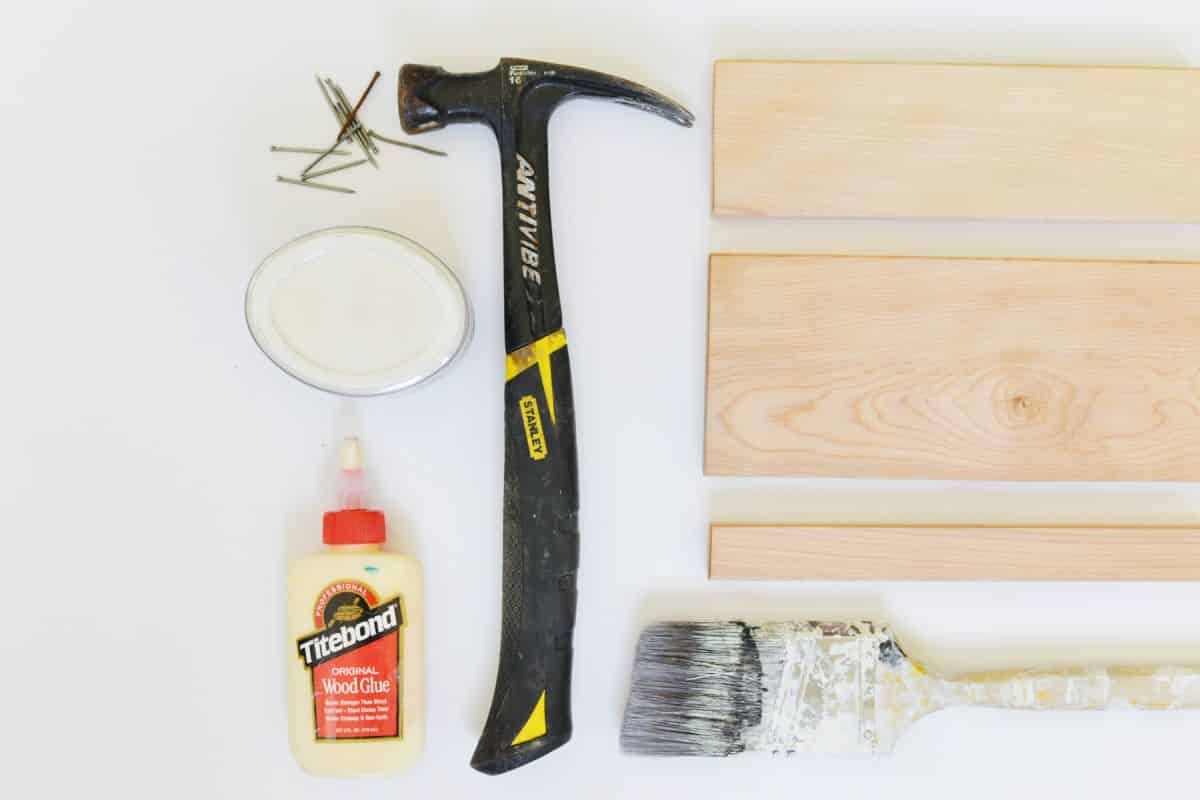
Ensure you have these on hand before starting to avoid last-minute runs to the hardware store:
● Shelf materials: Plywood or solid wood boards
● Hardware and fasteners: Wood screws, brad nails and wood glue
● Measuring tools: A tape measure, pencil and level
● Cutting tools: A circular saw or miter saw
● Assembly tools: A power drill or driver and a stud finder
● Finishing supplies: An orbital sander and sandpaper
● Safety gear: Safety glasses and gloves
Wearing safety gear, such as glasses and gloves, is crucial when woodworking, as it involves
chemicals and wood dust that can cause skin and respiratory problems. Power tools can also
cause injuries, ranging from lacerations to blindness, so be sure to follow proper safety
procedures when using them.
Step-by-Step Building Guide
Build and customize a floating shelf for your space with these steps.
Plan Your Bookshelf
Determine the final dimensions of your shelf. Use the stud finder to locate and mark the studs
on the wall where the shelf will hang.
Build the Inner Support Frame
The support frame will be completely hidden inside the finished shelf. Cut a 2×3 or 2×4 to the
desired shelf length minus ½ inch — if your desired shelf is 36 inches, cut your frame to 35.5
inches. This will serve as the main “cleat” that mounts to the wall.
Cut several shorter support arms that will extend outward from the cleat. Assemble the frame by
screwing the support arms into the wall cleat at 8-12 inch intervals. The final structure will look
like a rake.
Mount the Support Frame to the Wall
Hold the frame against the wall, then drive long wood screws through the back of the cleat and
into the wall studs. It should be securely attached.
Construct the Outer Shelf Box
This step is like building a hollow sleeve that will slide over the support frame. Cut the top,
bottom and front pieces from your ¾-inch plywood or solid wood boards based on your plans.
For example, for a 36-inch-long and 10-inch-deep shelf, you’ll need two pieces at 36″x10″ for
the top and bottom, and one piece at 36″x3″ for the front face. You’ll also need two small side
caps.
Assemble and Finish the Box
Use wood glue and brad nails or small screws to assemble the box and hollow sleeve. Once the
glue is dry, sand all the surfaces and apply your chosen paint or finish.
Install the Floating Bookshelf
Slide the finished shelf box over the support frame mounted on the wall. It should be a snug fit.
Then, secure the box to the frame by driving a few nails or screws through the top of the shelf
down into the inner support arms. This will keep the shelf from sliding off.

2. Craft a Wooden Archway Trim
Trimming a plain drywall archway is a great starting point for those looking to enhance their
woodworking skills. While it may seem like a job only seasoned carpenters can do, the process
is surprisingly simple. This architectural project is the perfect way to turn a simple pass-through
into an elegant and intentional design feature.
A High-Impact, Low-Cost Upgrade
A trimmed archway elevates the entire feel of a space. It’s a classic architectural detail that
makes any home feel more thoughtfully designed. It creates a graceful transition between
rooms, defining the entry to a dining room, living room or main hallway without closing it off with
a door.
This is also a project that draws eyes because trimmed archways are not a standard home
feature. You can adapt various styles to enhance your home’s aesthetic. For example, go for a
simple, flat-stock trim with clean lines for a modern farmhouse or craftsman look. For a more
colonial or traditional style, choose more ornate and detailed molding.
What You’ll Need
Prepare these tools and materials for a hassle-free building process:
● Trim materials: Flexible molding, solid wood and layered plywood
● Templating materials: A large piece of cardboard or craft paper
● Measuring and marking tools: A tape measure, pencil and level
● Cutting tools: A jigsaw, reciprocating saw or circular saw
● Fasteners: Construction adhesive, wood glue, hammer and nails
● Finishing supplies: Wood putty, paintable caulk, sandpaper, primer and paint
If you plan to tackle more woodworking projects, you may want to invest in industrial cutting
tools for your home workshop. For this project, consider a bandsaw for precise curve cuts and a
miter saw for smooth straight cuts. Ensure you get a machine with the right throat depth and
gap height for your needs.

Step-by-Step Building Guide
Follow these steps to craft the perfect archway trims for your space.
Create a Template
Tape a large piece of cardboard or paper over one side of the archway. From the other side,
trace the inside curve of the arch onto the material to create an exact-match template.
Cut and Prepare the Trim Pieces
For the arched piece, transfer your template’s curve onto your chosen material, carefully cut
along it and sand the curved edge smooth. For the vertical pieces, measure the distance from
the floor where the arch begins to curve on both sides. Then, cut your straight trim pieces to this
length.
Install the Vertical Pieces
Apply a zigzag line of construction adhesive to the back of a vertical trim piece, and press it
flush against the inside of the entryway. Use a level to ensure it’s straight. Secure the piece with
nails, then repeat the process on the other side.
Install the Arched Piece
Perform a “dry fit” to ensure the arched piece aligns seamlessly with the vertical pieces. Stick it
to the drywall with construction adhesive. Ensure it’s aligned with the tops of your vertical trims,
then secure it with nails.
Apply the Finishing Touches
Make your project look professional. Fill every nail hole with wood putty, then sand it once it has
dried. Apply a paintable caulk in every seam, smooth it with your finger and prime or paint it to
match the rest of your home’s trim.
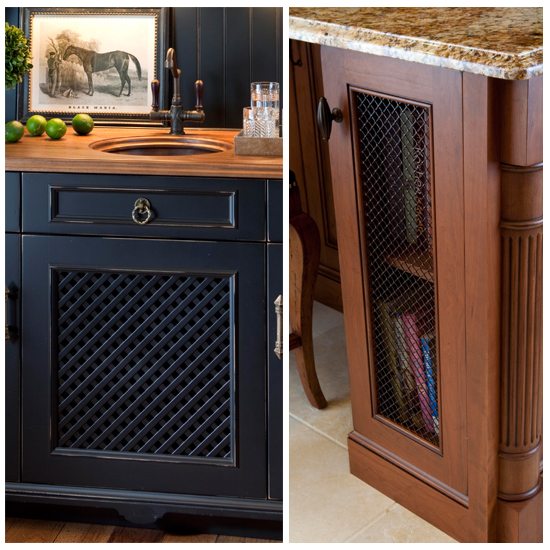
3. Design Custom Kitchen Cabinet Door Inserts
Of the three projects, this one offers the most dramatic visual transformation for your home.
Swapping the solid center panels of your cabinets is a brilliant and budget-friendly way to
refresh your kitchen’s style without the cost and chaos of a full remodel. It’ll let you inject a dose
of personality into your space, whether you want a brighter, more open feel or a touch of rustic
charm.
A New Look Without a Full Remodel
Kitchen remodels are among the most popular home projects. Major and minor upgrades can
provide a 60% return on investment, making them ideal for those looking to sell their home.
However, they’re notoriously expensive, especially when they involve cabinet upgrades and
other significant changes that need professional assistance. Cabinet door inserts are a smart
and budget-friendly renovation for savvy DIYers.
Cabinet doors are the largest visual element in the kitchen. Changing their center panels can
make a dark, dated kitchen feel bright and modern. Consider how solid wood doors can feel
heavy and repetitive. Using door inserts like glass or wire mesh creates visual “breathing room,”
adding depth and texture to the space. It also provides a great way to display your favorite
dishes and glassware.
What You’ll Need
Here are the essentials to building custom door inserts for your kitchen cabinets:
● Insert materials: Glass, plexiglass, metal mesh, beadboard, v-groove panels or
punched tin panels
● Measuring and marking tools: Tape measure, ruler, pencil and painter’s tape
● Tools: Router with a rabbeting bit, oscillating multi-tool, jigsaw and power drill
● Fasteners: Clear silicone or construction adhesive, glazing points for glass, small turn
buttons or brad nailers
● Safety gear: Safety glasses
Consider your style when selecting insert materials. Opt for glass or plexiglass to make your
kitchen feel more open. Metal mesh is perfect for an industrial, modern or farmhouse look, while
beadboard or v-groove panels are ideal for a cozy, coastal or rustic aesthetic.
Step-by-Step Building Guide
Design and install the custom door inserts with these steps.
Prepare Your Cabinet Doors
Unscrew the doors from the cabinet and remove all hardware, such as the hinges, knobs and
pulls. Use a piece of painter’s tape to label each door and its corresponding cabinet box to avoid
mixing them up.
Mark and Cut the Center Panel
On the back of the door, use a ruler to draw a straight, even cutting line around the inside edge
of the main frame. Cut along the line to remove the center panel.
Create the Recess
Set the depth of your router’s rabbeting bit to about half the thickness of the door frame. Guide
the router around the inside back of the opening you just cut. It will carve out a “rabbet” or a
perfect ledge for your new insert to sit on. If you don’t have a router, glue and nail thin wood
strips around the inside back of the opening to create a ledge.
Cut and Prepare the New Insert
Measure the final dimensions of the opening, from inside edge to inside edge of the rabbet.
Subtract 1/8 inch from both the height and width to allow for an easy fit, then cut your insert
material to these final dimensions.
Install the New Panel and Reassemble the Cabinet
Paint or finish the cabinet doors before you install the new insert. Apply clear silicone in the
rabbet channel you created, then carefully press your new insert panel into place. Secure the
panel from behind. Use glazing points for glass, turn buttons for other materials or pin them in
place with nails. Once the adhesive cures, reinstall the hardware and hang your beautifully
transformed doors in their place.

The Lasting Value of a Winter Well Spent
There’s nothing more satisfying than building something beautiful with your own hands. Each of
these projects is a tangible improvement that adds character and function to your space.
However, remember that while the winter days may be long, they’re also a limited resource. Use
them to invest in your home and your skills, and you’ll create lasting value and a story you can
tell for years to come — all while staying warm and cozy indoors.